This Tutorial is a useful guide to learn how to use the Stitch Groover Pro.
This instrument is a very practical tool that allows you to make a clean and a straight stitching line on the leather.
Stitch Groover Pro and its accessories
The tool is composed by:
- Hard Wooden Handle;
- Locking Ring;
- Steel Edge Guide;
- Stitch Groover Blade on top.
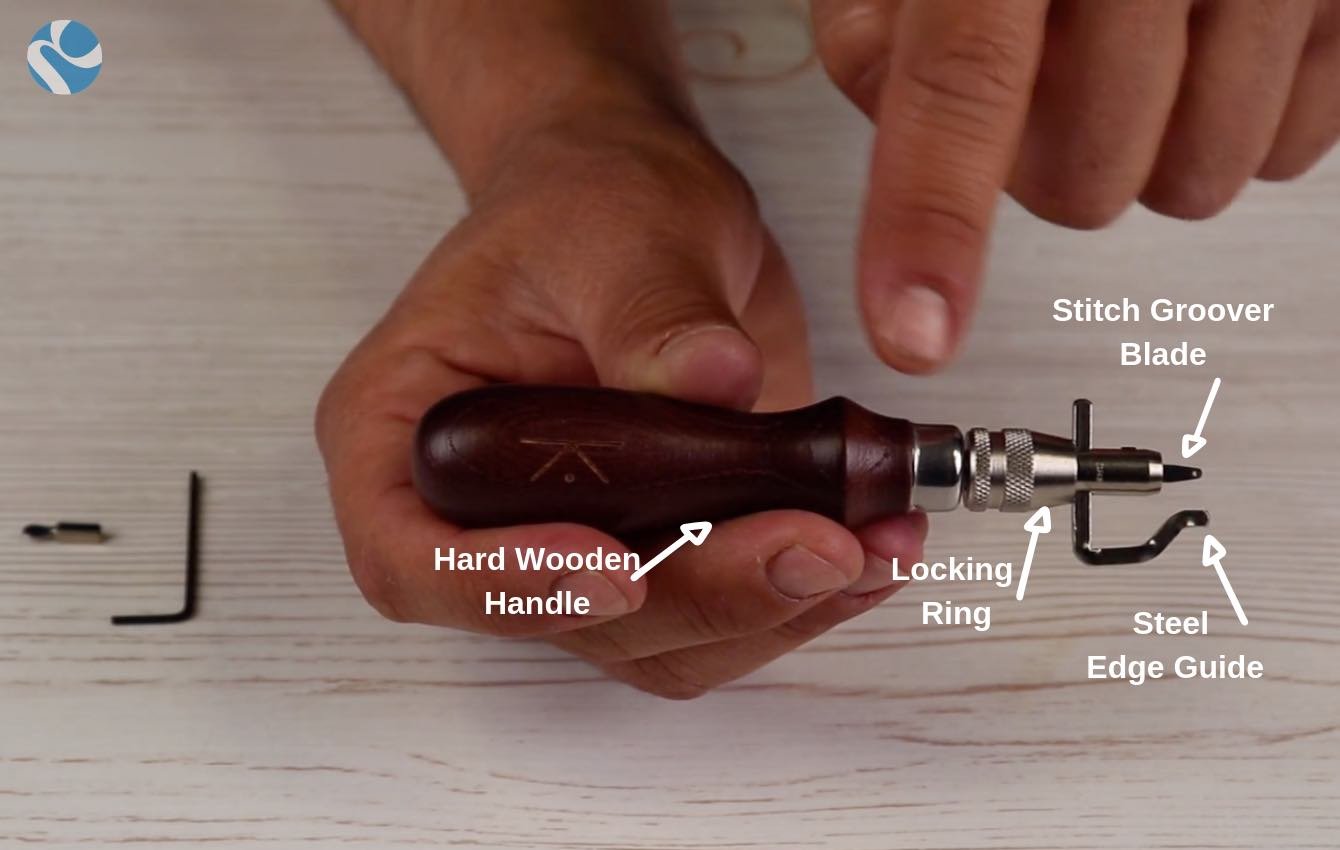
This stitching groover blade makes the difference among other similar tools: this blade is made in Japan and its great sharpening makes its use very simple.
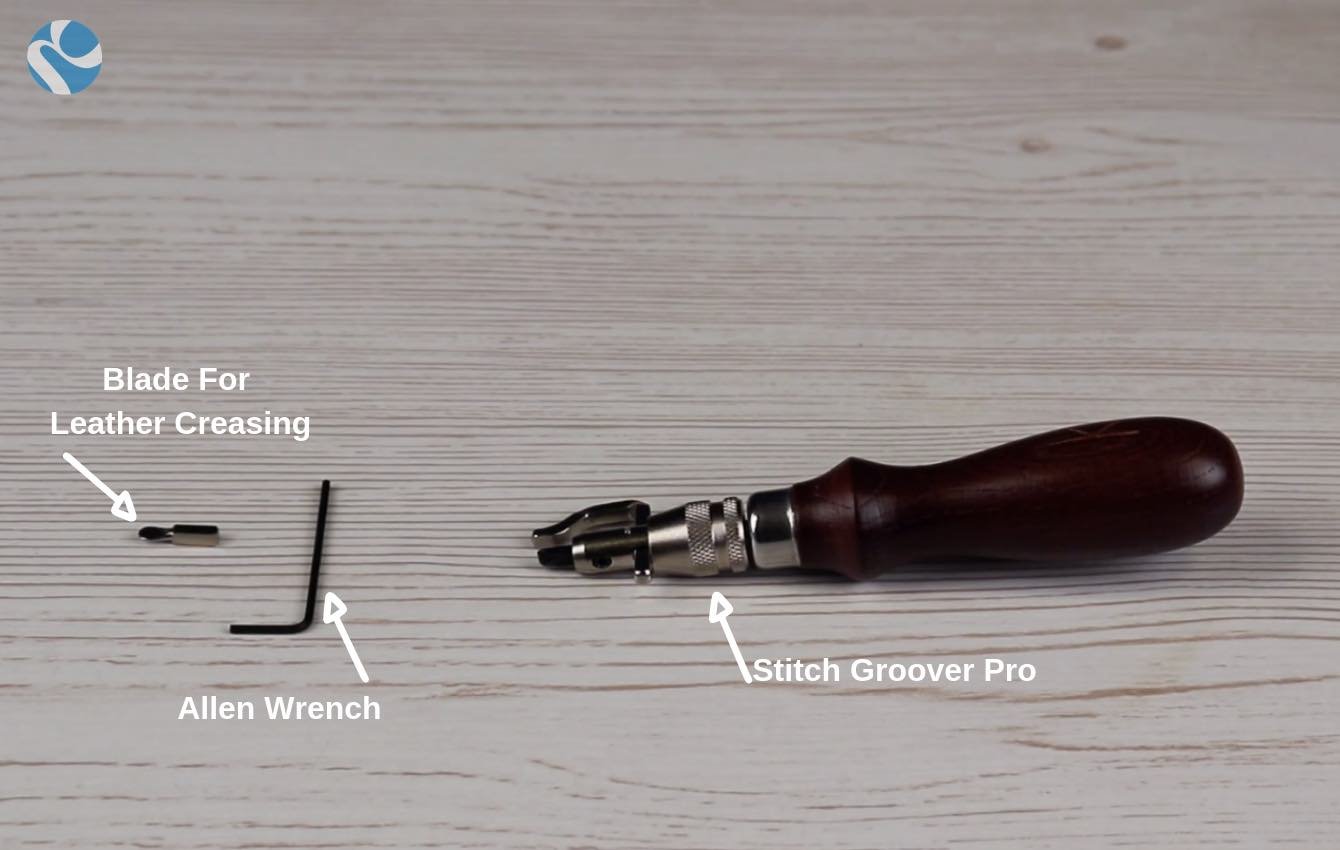
The accessories supplied with this tool are:
- A blade for leather creasing
- Allen wrench (necessary to change the blade).
How can this simple tool help you with stitching?
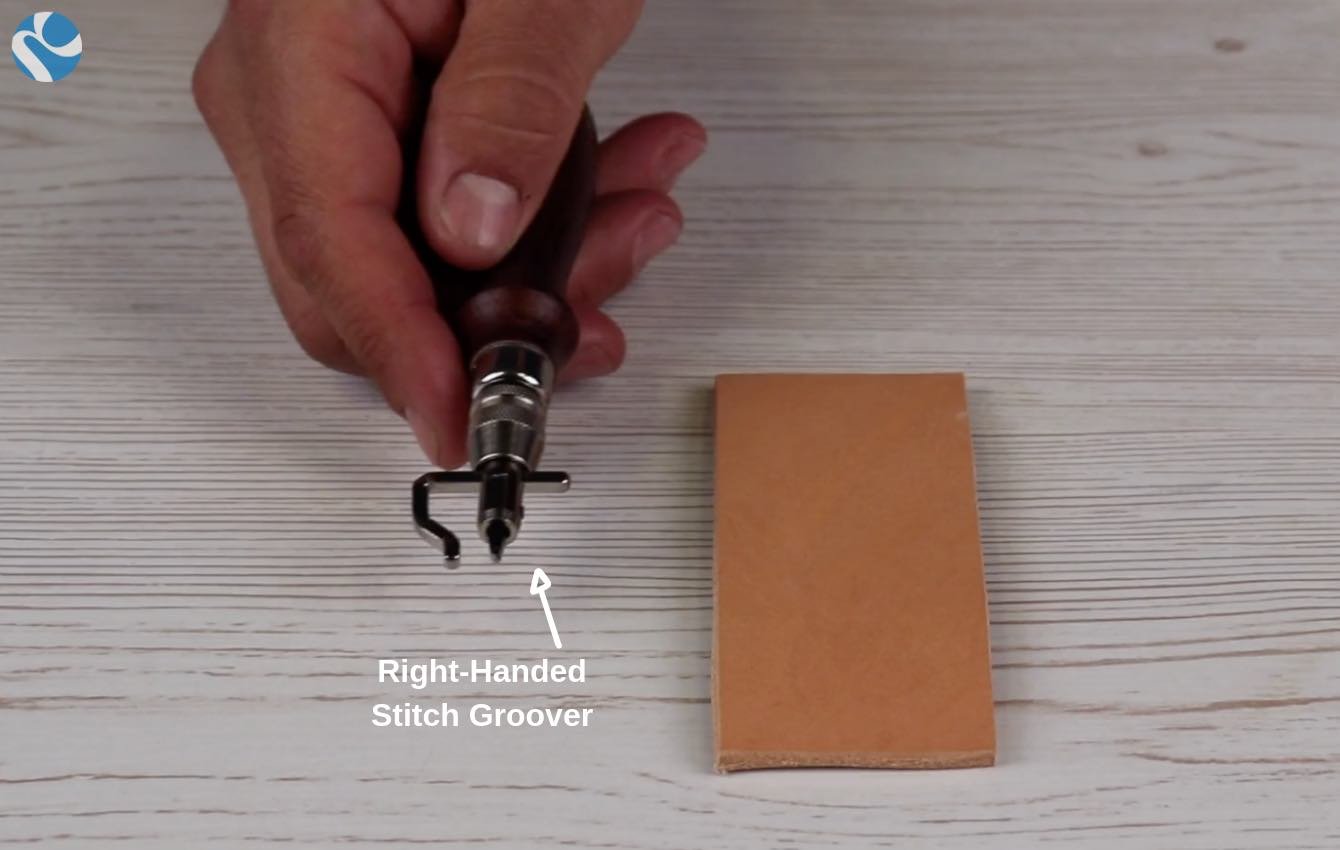
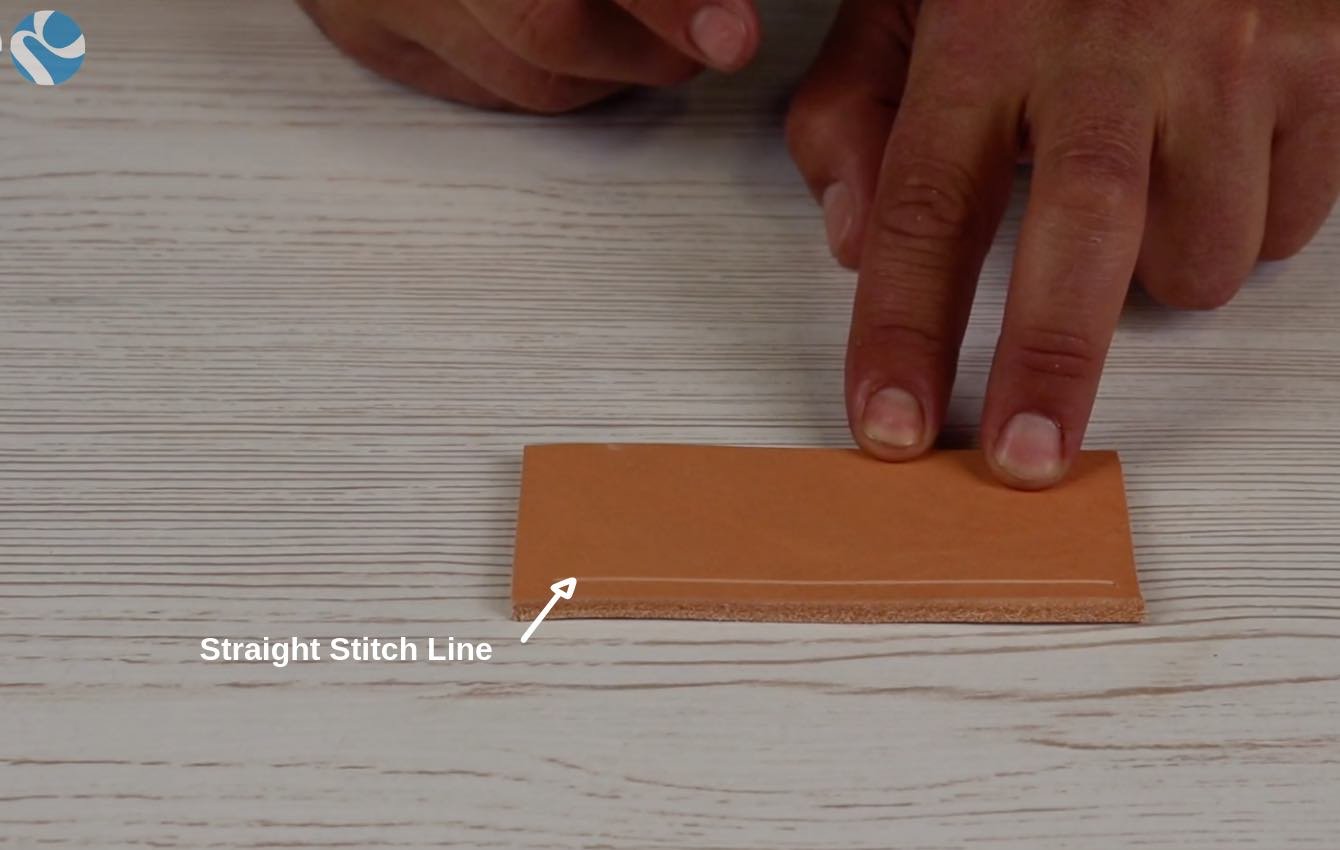
The purpose of this tool is to cut a groove down the edge of the leather, getting a perfectly straight stitching line.
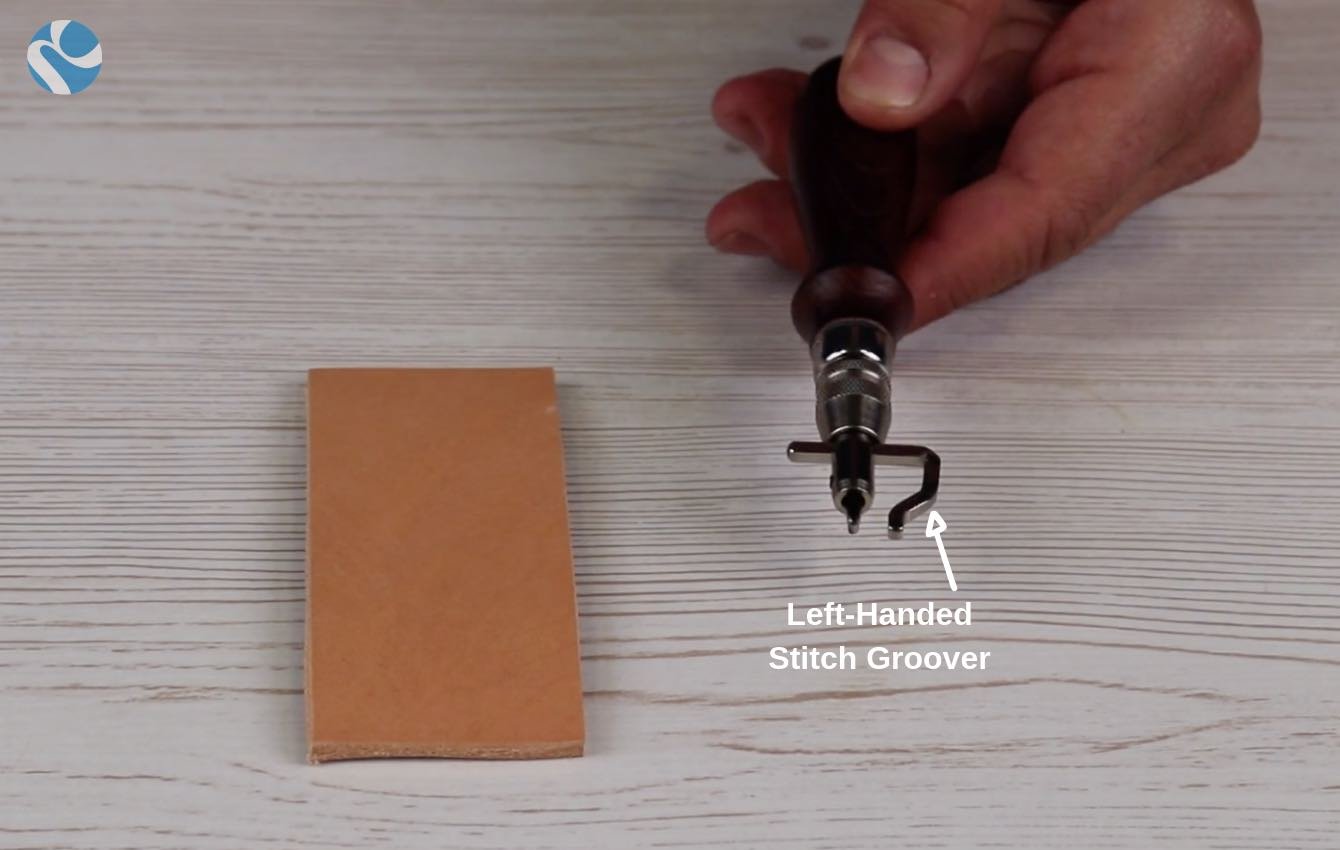
Normally it is for right handed, but simply inverting the position of the blade it can be used from left handed too.
 |
 |
Before starting, you must adjust the distance, using the locking ring. This space will be the distance from the leather edge where you will have your stitching line.
Lay down the stitching groover on the leather with an angle between 30° and 45° and slide along the edge pushing down.
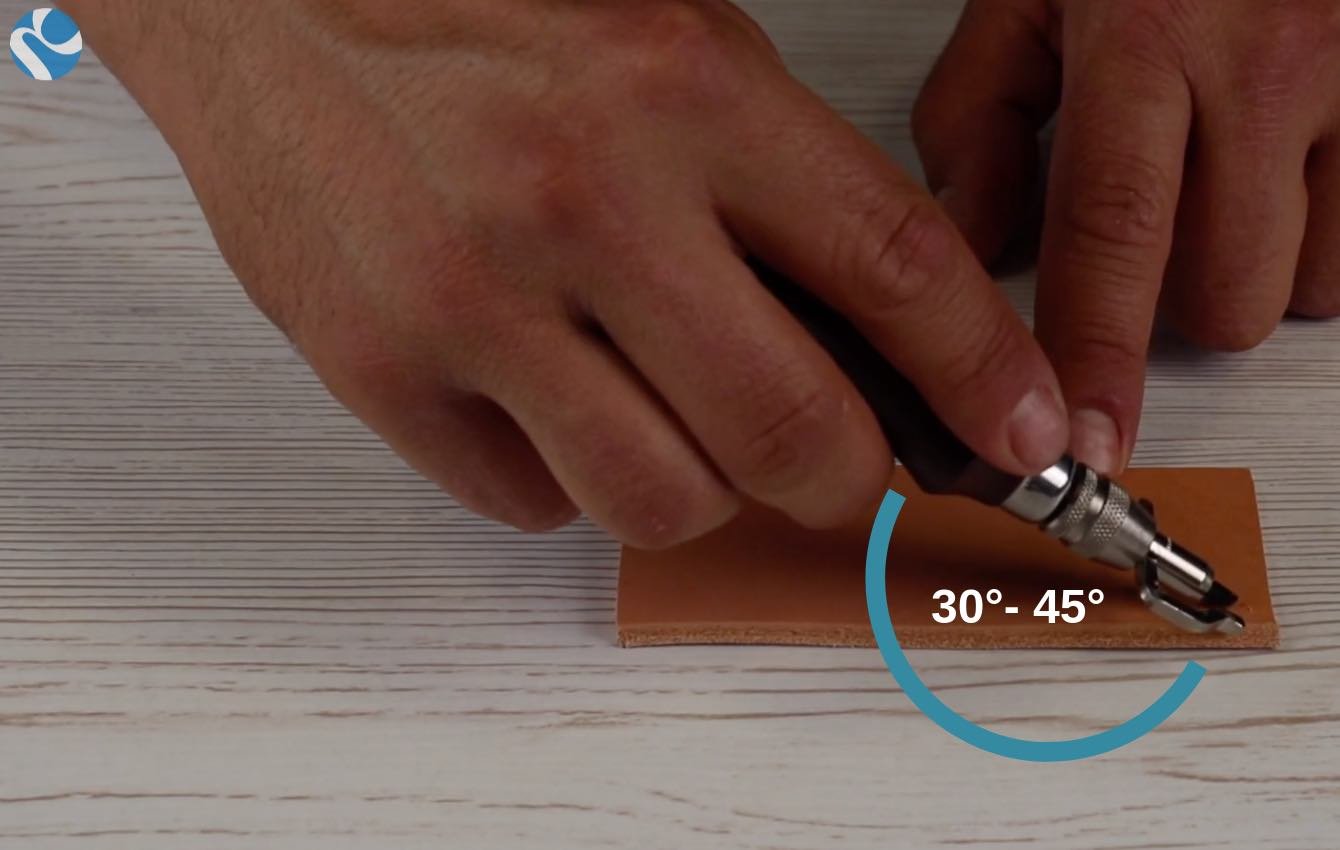
The first cut makes a groove with a depth of approximately 0.3 mm (0,011 inch).
If you want a deeper cut, simply repeat the operation.